Follow these steps;
Click on Manage Branches. Select main branch. Select Sync to sync your local branch.
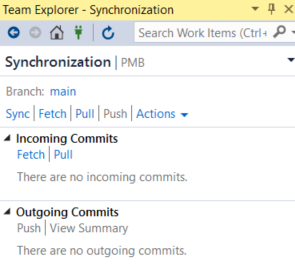
Everything looks good. Move on with creating a new branch.
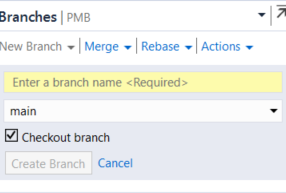
Click on Manage Branch and New Branch.
Your view would be changed to newly created branch.

Start work. Change something in about.cshtml page, Save and commit; If that’s all you need to work on then push your local branch to remote. Click on Home icon; Click Sync.
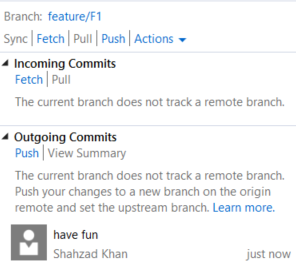
You can see there are no incoming changes on this branch. there are outgoing changes that you have made. There is a message that’s telling you that this branch does not exists on remote server.
Click Push. You will see this view;
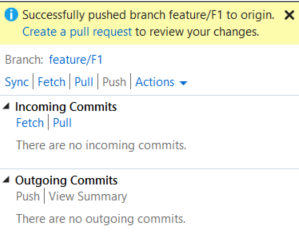
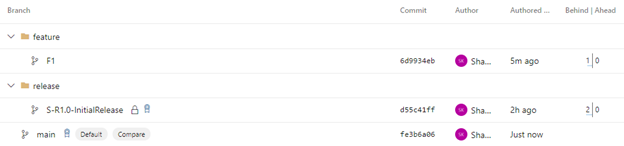
Click on “Create a pull request”. Create/Approve and complete your pull request on Azure DevOps UI. Your branches view would be;
Your merge is completed. Do a sync here.
Switch to main branch. do a sync here. You will see this;
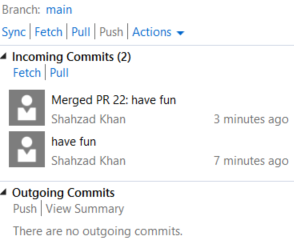
There are two commits went into main branch. first one is the pull request merge and second one is the change you made. Click on Sync. It will pull remote commits to your local.
Your main branch is up to date for your next branch work.

 Add to favorites