All about code tracking and management for example, Azure DevOPS branching and merging, Release management, Continuous integration (CI) and Continuous deployment (CD).
The easiest way is to clone existing pipeline through Azure DevOps portal. Click on Pipelines -> Your pipeline à Click the ellipse in the upper right corner (three vertical dots), then click clone.
If clone is not available due to any reason, you can create a new pipeline based on an existing yaml file which is basically cloning.
Pipelines -> New Pipeline -> Configure (3rd page of the wizard) -> Select “Existing Azure Pipelines YAML file”.
Here you can select the branch and the file you want to use. However, this does not copy the variables set in the pipelines.
Above solution will work within same project. If you want to clone/import pipeline from a different project, Select “Export to YAML” from source project pipeline. This will download a YAML file on your local. Open file, make changes and import to your new project repo.
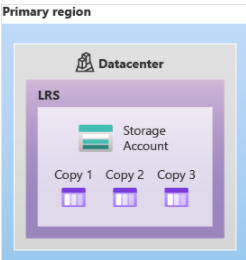
Locally redundant storage (LRS) replicates your data three times within a single data center in the primary region. LRS provides at least 99.999999999% (11 nines) durability of objects over a given year.
The following diagram shows how your data is replicated within a single data center with LRS:
LRS is the lowest-cost redundancy option and offers the least durability. If a disaster such as fir or flooding occurs with the data center, all replicas of a storage account may be lost or unrecoverable.
Zero-redundant storage
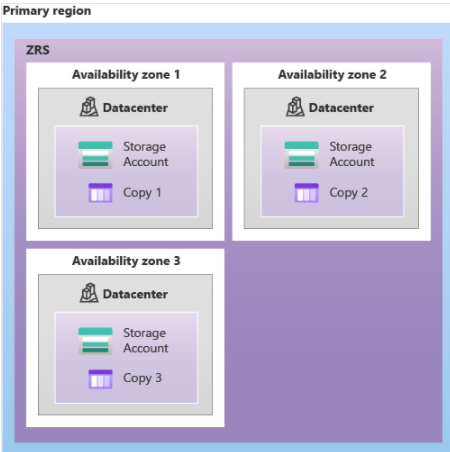
Zone-redundant storage (ZRS) replicates your Azure Storage data synchronously across three Azure availability zones in the primary region. Each availability zone is a separate physical location with independent power, cooling, and networking. ZRS offers durability for Azure Storage data objects of at least 99.9999999999% (12 9’s) over a given year.
The following diagram shows how your data is replicated across availability zones in the primary region with ZRS:
Microsoft recommends using ZRS in the primary region for scenarios that require consistency, durability, and high availability.
If your application is restricted to replicating data only within a country or region due to data governance requirements, you may opt for LRS or ZRS. The reason, In some cases, the paired regions across which the data is geo-replicated may be in another country or region.
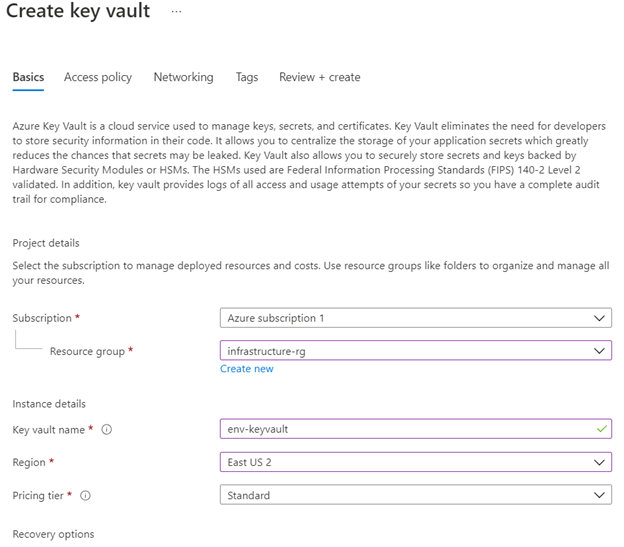
I am going to create and configure Azure key vault in this demo. I am assuming that an app services has already been provisioned. We need to make a configuration change for SQL connection so that Key Vault secret can be used without touching the application code.
Provision the Azure Key Vault
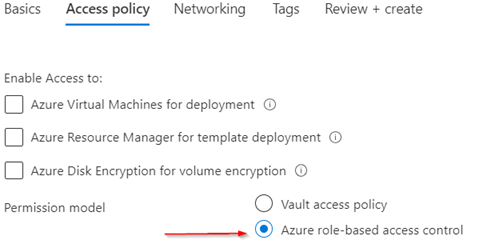
For this demo, I am going to use new permission model that is based on Azure role-based access control (RBAC).
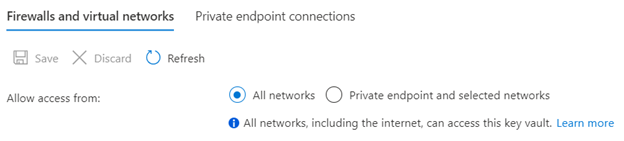
I am leaving it as Public endpoint to match the App service configuration.
Click on Review + Create button to start the deployment.
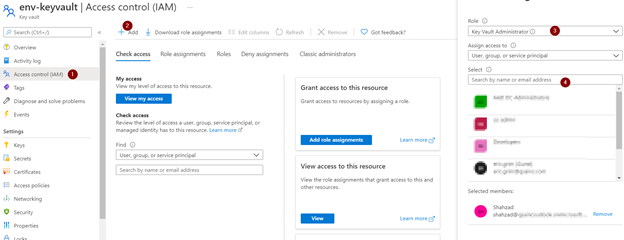
Once created, add yourself to the role “Key Vault Administrator” via the Access Control (IAM). Now you can start managing secrets.
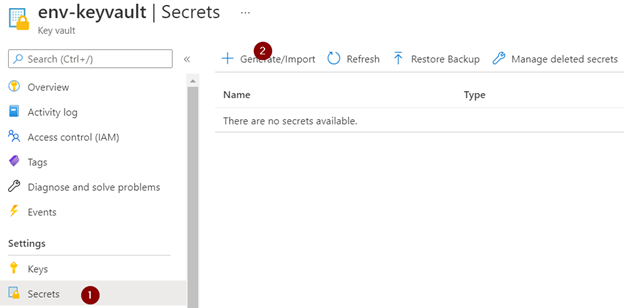
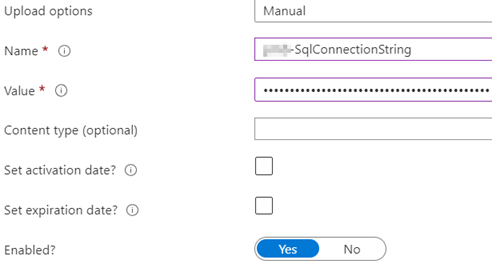
Add the connection string to the Key Vault secrets.
Secret type (Upload options) “Manual”, give it a name and set the value to the SQL Database connection string to your Azure SQL or Azure SQL VM.
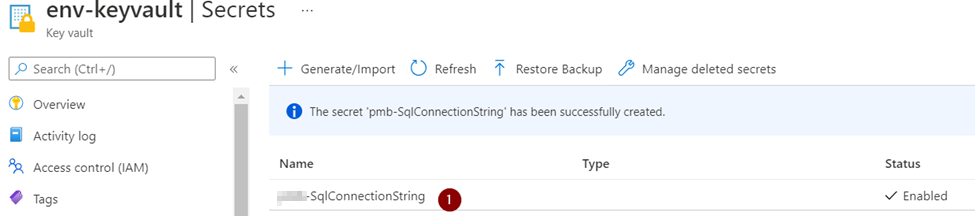
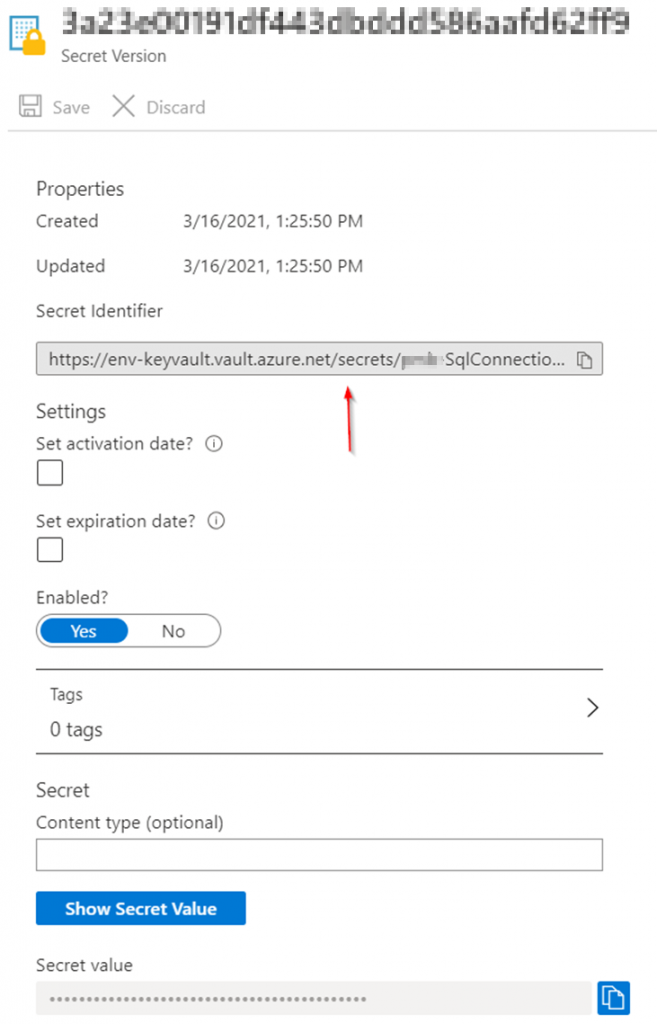
Click on Create. Once created, click on the secret to see the secret details, then click again on the current version.
Copy Secret Identifier to your clipboard.
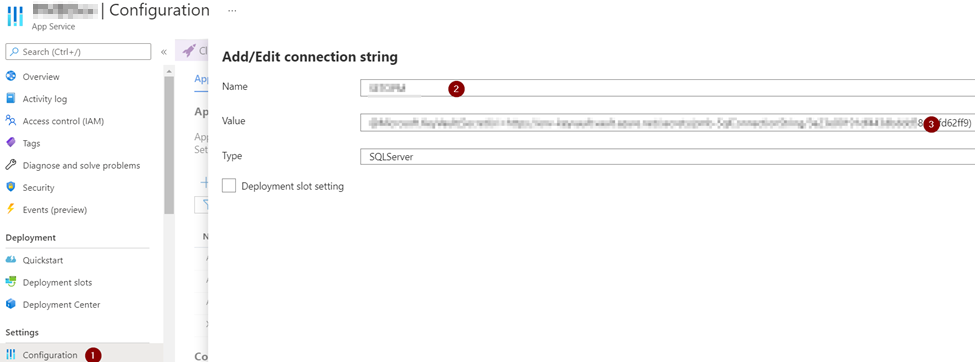
Add the Secret identifier reference to the Azure App Service Settings
Open the App Service configuration settings, and ad a new Connection string setting.
Type the name of the connection string (“SqlConnectionString” for application) and set the value. You can use the same name that you have used in appsettings.json file. Set the value;
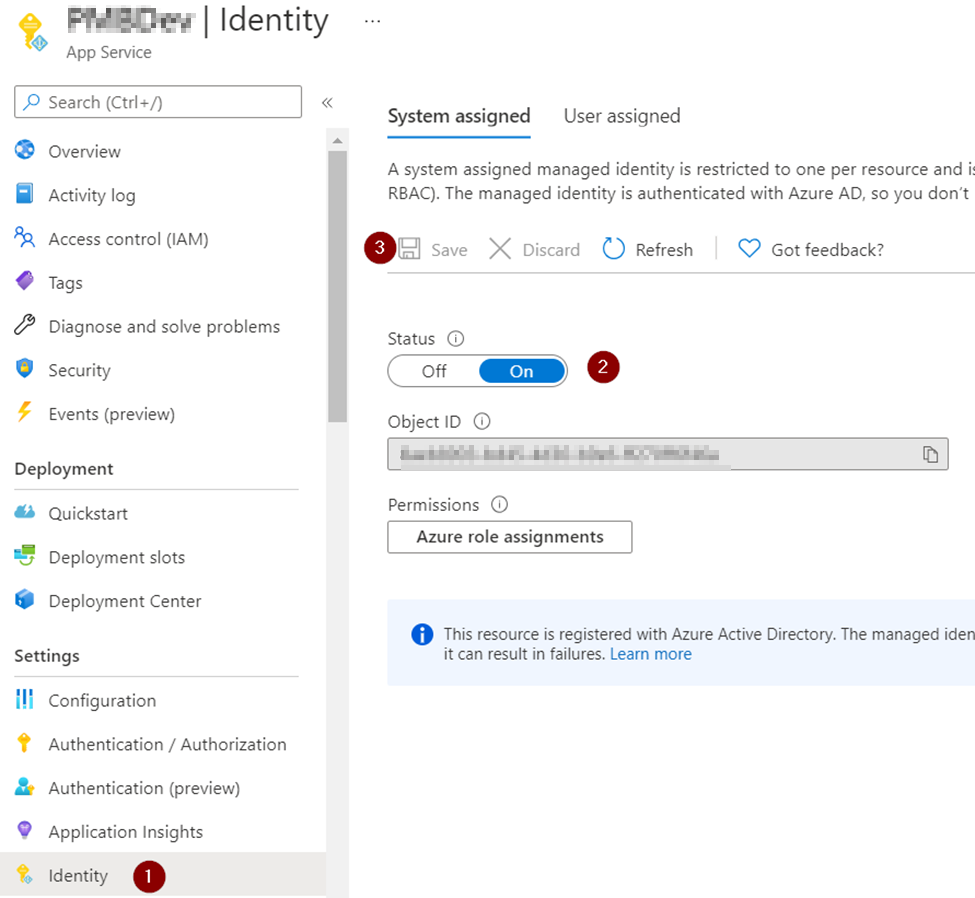
On the App Service, click on Identity to enable the System Assigned identity. Click on save after turning “On” the status.
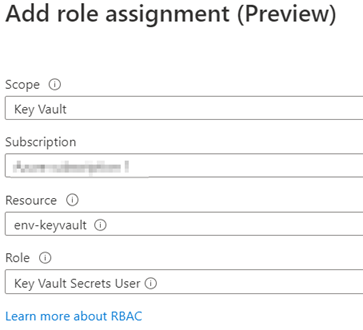
Click on the “Role Assignments” button and then click on the “Add role assignment”. In the role assignment, choose scope “Key Vault”, subscription the subscription where you created the Key Vault on previous steps and the name of the Key Vault resource. For the role just select “Key Vault Secrets User (preview)”
You can go to the appsettings.json/web.config file of your application and clear the connection string value;
Visit your website and see if it loads successfully. The connection string is safely stored in the Azure Key Vault, and it’s no longer stored on the file system.
Known issues
ERROR: You might get an error “Keyword not supported: ‘@microsoft.keyvault(secreturi'”. I have experienced that the RBAC permissions can take a one or two minutes to be applied, so try after a few minutes. Also try restarting the application thought the App Service portal so nothing is cached.
another error might be this;
ERROR: Format of the initialization string does not conform to specification starting at index 0.
Check your connection string. it has spaces or is not right.