When we use the Azure Functions Flex Consumption plan, the platform dynamically manages the underlying infrastructure. This means the outbound IP addresses are not static or predictable in the same way they are with dedicated plan like App Service Environment.
The Private IP Address (172.25.1.187) is an internal, virtual network address within the Azure infrastructure and not a public, internet-routable IP address. Key vault’s firewall is designed to filter based on public IP addresses or specific virtual network rules. It wouldn’t accept, non-routable IP address in its allow list.
The correct way to solve this is to use a Virtual Network (VNet) service Endpoint or an Azure Private Endpoint. This method allows your Azure Function to securely connect to the Key Vault over the Azure backbone network without using Public IP addresses.
The Solution
The correct way to solve this is to use a Virtual Network (VNet) Service Endpoint or an Azure Private Endpoint. This method allows your Azure Function to securely connect to the Key Vault over the Azure backbone network without using public IP addresses.
Here’s how you can implement this:
- Integrate Your Azure Function with a Virtual Network
First, you need to integrate your Azure Function App with a virtual network. This feature allows your function to access resources within a VNet. Since your function app is on a Flex Consumption plan, you’ll need to use the Regional VNet Integration feature. - Configure a VNet Service Endpoint for Key Vault
Once your function app is integrated into a VNet, you can configure a VNet Service Endpoint on your Key Vault. This feature extends the VNet’s private address space and identity to the Azure Key Vault. When a resource (like your function app) in that VNet attempts to access the Key Vault, the traffic stays on the Azure backbone network instead of going over the public internet.
Steps to configure the VNet Service Endpoint:
- Go to your Azure Key Vault.
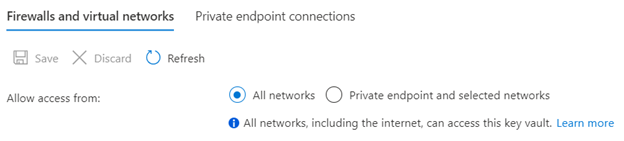
- Navigate to the Networking blade.
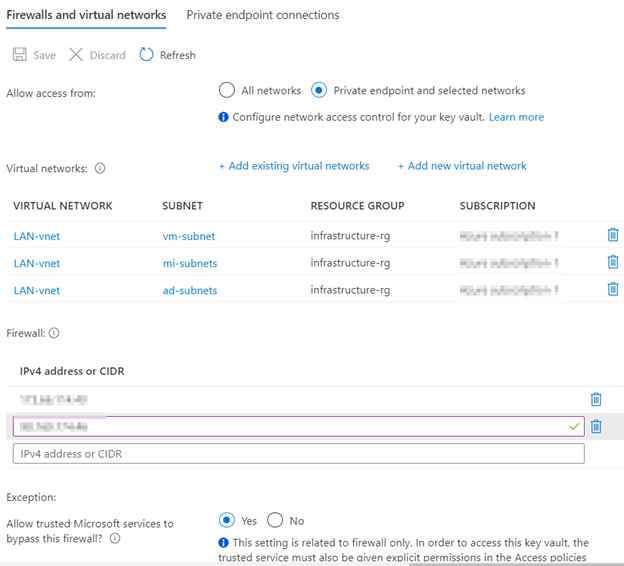
- Under the Firewalls and virtual networks tab, select Allow public access from specific virtual networks and IP addresses.
- Click + Add existing virtual networks.
- Select the virtual network and the subnet that your Azure Function is integrated with.
- Enable the Service endpoint for Microsoft.KeyVault on the subnet.
(Alternative) Use a Private Endpoint
A more secure and private alternative is to use an Azure Private Endpoint. This creates a private network interface for your Key Vault in your VNet, assigning it a private IP address from your VNet’s address space. This makes the Key Vault accessible only from within your VNet.
Steps to configure the Private Endpoint:
- Go to your Azure Key Vault.
- Navigate to the Networking blade.
- Select the Private endpoint connections tab.
- Click + Private endpoint.
- Follow the wizard to create the private endpoint, linking it to your VNet and a specific subnet.
- Update your function app’s code or configuration to use the private endpoint DNS name for the Key Vault.
Recommendation: The VNet Service Endpoint approach is generally simpler to implement and is the standard solution for this scenario. The Private Endpoint offers a higher level of network isolation and is often preferred for more sensitive applications.
This approach resolves the issue by bypassing the public IP address limitation of the Key Vault firewall and establishing a secure, private connection between your Azure Function and the Key Vault.