How and where to take backup;
Category: Dev Ops
All about code tracking and management for example, Azure DevOPS branching and merging, Release management, Continuous integration (CI) and Continuous deployment (CD).
Azure DevOps Git Clone error
I have changed my user’s name in Azure DevOps. When I try to clone to repo, started getting this error;

I have no permission issues then what the heck?
It turns out that the issue is with the URL. Please don’t try to connect to url which is produced by portal, something that look like this;
https://project-account@dev.azure.com/project-name/apps/_git/chart
instead try to connect thru your GIT username and then use password;
https://username@dev.azure.com/project-name/apps/_git/chart
If you username has special characters, Git cmd/bash will trhough errors, so replace those with valid characters;
@ can be replaced with %40
+ can be replaced with %2b
Something like;
https://username%40xyz.com@dev.azure.com/project-name/apps/_git/chart
what a waste of time…
One of my developer started getting Git Credential Manager for windows popup and received Authentication failure message. The work around was;
Check the Git for Windows in the Tools – Get Tools and Features…), go to “Individual Item” tab, check “Git for Windows”, and click “Modify”. Then it will ask you to update vs2017 to latest version, for example 15.9.36.
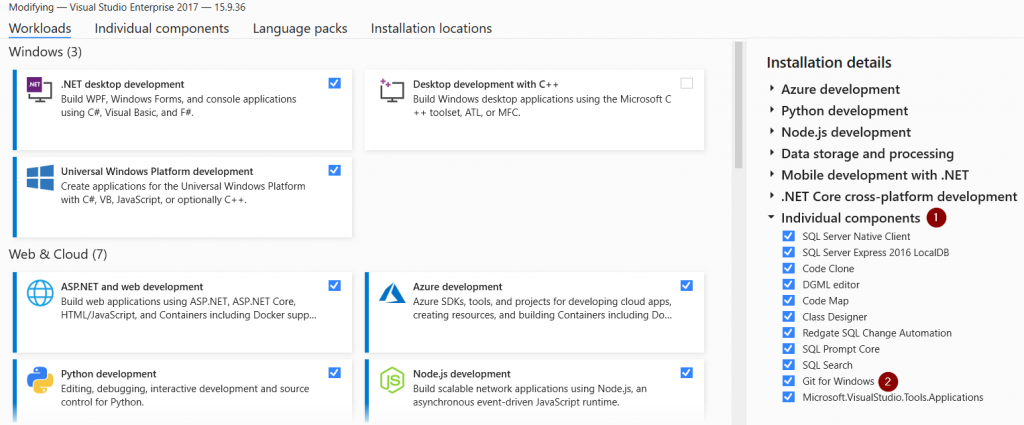
Voila, it started working.
Resource
https://stackoverflow.com/questions/34837173/authentication-failed-for-azure-git
Connect your organization to Azure Active Directory
If your organization was created with a Microsoft account, connect your organization to your Azure Azure AD. Sign in to Azure DevOps Services with the same username and password that you use with your Microsoft services. Enforce policies for accessing your team’s critical resources and key assets.
There’s no downtime during this change, but users are affected. Let them know before you begin.
Sign in to your organization https://dev.azure.com/{yourorganization}
Select Organization settings -> Users.
Compare Azure DevOPS email list with your Azure AD email list. Create an Azure AD email address entry for every user who’s in the Azure DevOPS organization and not in the Azure AD.
Connect organization to Azure AD by selecting Azure Active Directory.

Click on Connect directory;
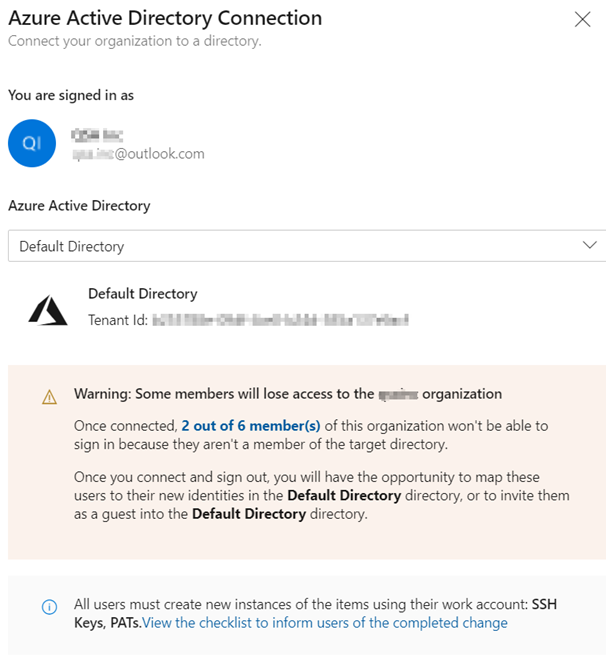
2 out of 6 members(s) are the members that doesn’t exist in Azure AD. They are guest developers using their hotmai/gmail account. If we want to allow them to use Azure DevOPS, we need to create their accounts as Guest in Azure AD.
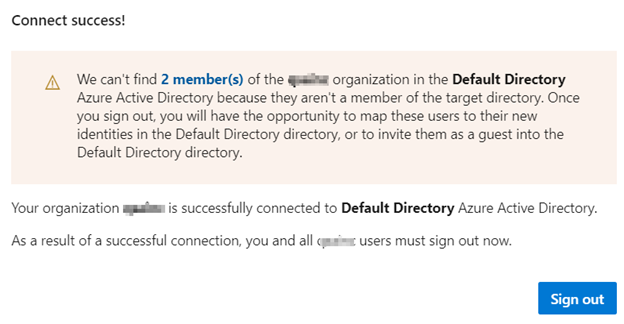
Sign out of Azure DevOPS.
Sign in with your Azure AD account. If you click on Organization Settings -> Azure Active Directory, you will see this page;
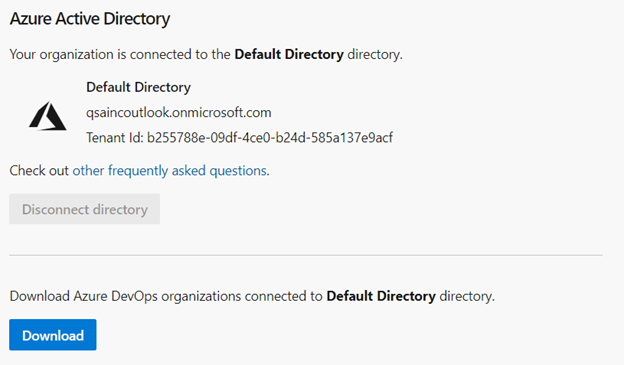
Clicking on Download will download your organization info, Azure DevOPS info and Owner of Azure DevOPS environment and any errors in the connect. This ensures that Azure DevOPS is connected with Azure.
Make adam@{yourorganization}.onmicrosoft.com as “Project Collection Administrators”. This role perform all kind a operations.
Test your access on Azure DevOps and Visual Studio. You will be asked to enter your credentials and approval from Microsoft Authenticator.
Resource;
Release pipeline for Azure Storage
Azure File Storage is an easy and active service. We can access it programmatically and through UI. This article is focused on Azure DevOps Release pipeline and Release deployment to Azure File Storage. We can use Azure Storage Explorer (UI) to move builds around different environment or locations.
I am assuming that you already have crated a project and build pipeline.
Azure DevOps already offers a task to release the code to Azure storage. This task is Azure file copy.
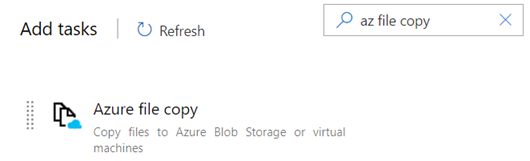
However, this task does not deploy to Azure Files storage. It does deploy to Azure Blob and Virtual Machines only.
An example of copying data from a local directory to a blob container using SAS token;
azcopy copy "C:\local\path" "https://account.blob.core.windows.net/mycontainer1/?sv=2018-03-28&ss=bjqt&srt=sco&sp=rwddgcup&se=2019-05-01T05:01:17Z&st=2019-04-30T21:01:17Z&spr=https&sig=MGCXiyEzbtttkr3ewJIh2AR8KrghSy1DGM9ovN734bQF4%3D" --recursive=trueThe difference between Azure Blob is [https] storage and Azure File [smb] storage. We don’t have any default task to release the code to Azure File Share.
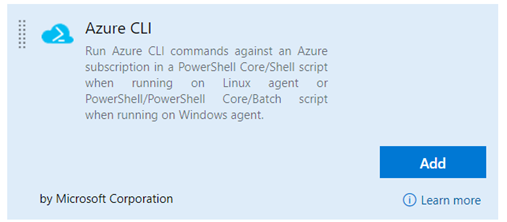
What should we do then? Azure CLI can be used to copy files to Azure File storage. Here is the task that can be used;
To keep things simpler, I am not using YAML. I will be using simple UI.
Build a Release Pipeline
Click on “Release -> New Pipeline -> Empty” as show below;
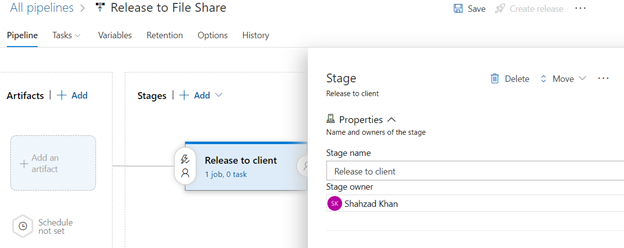
Rename pipeline to a meaningful name “Release to File share”.
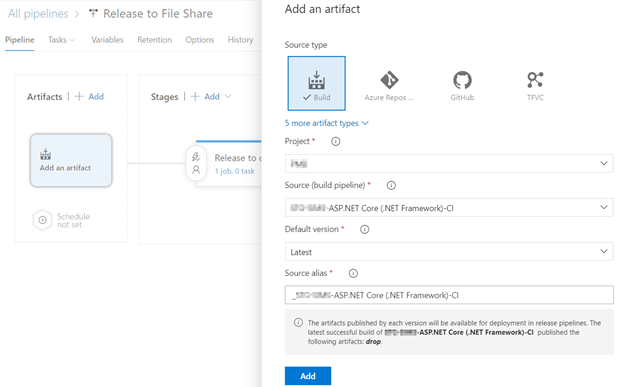
Map incoming build output as input to release pipeline. Click on “Add an Artifact” option in Artifacts box and select the source type as Build. It will list the latest build automatically. Select this option as show below;
Save your changes. Under the stages in the second box ,you should see text like “1 job, 0 task”.
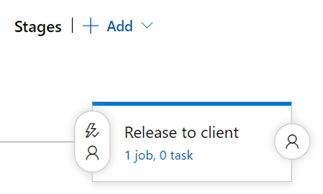
Click on it. Click on “+” sign against Agent job tile. Select Azure CLI from the task and click on Add. Here is how it looks;
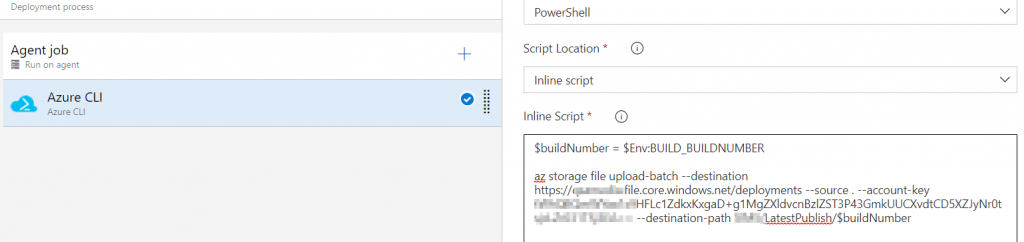
This is the PowerShell inline script;
$buildNumber = $Env:BUILD_BUILDNUMBER

az storage file upload-batch --destination https://[share name].file.core.windows.net/deployments --source . --account-key [share first key] --destination-path LatestPublish/$buildNumber
Create a release. Open Azure Storage Explorer, Navigate to your share and LatestPublish folder. Here is the build output;

The build is deployed with the last build number. Inside build number we can see build alias at drop location that we have defined in build pipeline. If you run the release pipeline again, it will overwrite the contents of file share.
This is the first attempt. We can optimize this process by introducing variables for builds, builds number etc.
Resources
https://docs.microsoft.com/en-us/cli/azure/storage/file?view=azure-cli-latest
https://www.sanganakauthority.com/2019/09/azure-devops-build-and-release-pipeline.html
https://stackoverflow.com/questions/27722205/new-azurestoragecontext-is-not-recognized
Self-Signed Certificate in Certificate Chain Error
There a few reasons you may be seeing this error, the two most common ones are:
- You are behind a “transparent proxy”, which means someone (such as your IT department) is intercepting HTTPS traffic, decrypting it, and then encrypting it using a self-signed certificate
- You are running software, such as anti-virus software, which is injecting a self-signed SSL certificates into the HTTPS messages you receive
When Storage Explorer encounters one of these “self-signed certificates”, it can no longer know if the HTTPS message it is receiving has been tampered with. If you have a copy of the self-signed certificate though, then you can tell Storage Explorer to trust it. If you are unsure of who is injecting the certificate, then you can try to find it yourself by doing the following:
- Install Open SSL
- Windows (any of the light versions should suffice)
- Mac and Linux: Should be included with your operating system
- Run Open SSL
- Windows: Go to the install directory, then /bin/, then double click on openssl.exe
- Mac and Linux: execute “openssl” from a terminal
- Execute
s_client -showcerts -connect microsoft.com:443 - Look for self-signed certificates. If you’re unsure which are self-signed, then look for any where the subject (“s:”) and issuer (“i:”) are the same.
- Once you have found any self-signed certificates, then for each one, copy and paste everything from and including
-----BEGIN CERTIFICATE-----to-----END CERTIFICATE-----to a new .cer file.
Open NotePad. Make sure, you are copying everything between —BEGIN CERTIFICATE— and —END CERTIFICATE— block. For example, if there are two certificates, then the file would be;
—BEGIN CERTIFICATE—
—END CERTIFICATE—
—BEGIN CERTIFICATE—
—END CERTIFICATE—
Save File as .cer on your computer.
- Open Storage Explorer and then go to Edit -> SSL Certificates -> Import Certificates. Using the file picker, find, select, and open the .cer files you created.
Resource;